
- Video Tutorial
- Set up a Free Accounts Tracker on Google Sheets to monitor all your accounts - Tutorial 1
Set up a Free Accounts Tracker on Google Sheets to monitor all your accounts - Tutorial 1
Hot
C
ctech
Updated
Enter the title for the tutorial
Set up a Free Accounts Tracker on Google Sheets to monitor all your accounts - Tutorial 1
Enter the detailed description of the tutorial
Watch Video
How to use Google Sheets to manage and track your online accounts?
Download the Google Sheets Accounts Tracker (Template 1) - http://bit.ly/3GnoJZr
Regardless of the geographic location,an average internet user has 50 or more accounts that need to be checked on a regular basis.
Download the Google Sheets Accounts Tracker (Template 1) - http://bit.ly/3GnoJZr
Regardless of the geographic location,an average internet user has 50 or more accounts that need to be checked on a regular basis.
In theory, that means users would need to keep track of all these accounts and also keep their family members aware of the important accounts such as banking, credit cards, insurance, streaming, school, college, communication services, investment, retirement, employment and many more.
Have you thought about how many online accounts you have? Are you also wondering how to keep track of all those accounts and check them periodically? You can set this accounts tracker easily using Google Sheets to monitor all your accounts from a single place. You can also update the sheet when you would have checked a particular account last time. In a way, you can closely monitor your spending and cancel the accounts that you don’t need or use any more.
This helps not only avoid forgetting to check any of these accounts, but also share them with your family members to access the consolidated list of accounts from anywhere through many internet enabled devices.
This is the first tutorial to show how to use Google Sheets to maintain and track all your accounts from a single place for FREE. Follow this step by step tutorial to set up your accounts with some basic information at a single place and share with other family members if you want. This will help to stay on top of monitoring all your accounts and take necessary actions as needed. It’s even better that you can access this accounts tracker sheet from any device with the internet.
To set up the accounts tracker, start with a new blank sheet.
- To create a new sheet, go to sheets.google.com and click to add a blank sheet. Also, you can go to docs.gogle.com. From the top left menu, select “Sheets'' and add a new blank sheet.
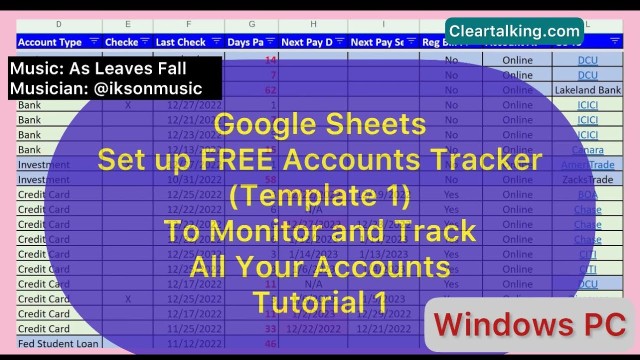
- Create the Accounts Tracker sheet by adding columns such as Institute Name, Account Name, Account Type, Last Check Date and Account Access
- Now your sheet is ready to add accounts information for monitoring and tracking.
- Institute name is the name of the institute such as bank, credit card issuer, insurance company, etc..
- Account Name is a user friendly name for you or shared users to recognize the account easily.
- You can adjust the column width to display the complete information in a particular column. Hover the mouse on the right side edge of the column header. The mouse cursor should change into a double arrow. Drag the line until the column is wide enough to view the complete information and release the mouse.
- Account Type can be used to group similar accounts such as bank, investment, retirement, etc..
- In the “Last Check” column, you can update with the date when you have last checked this account.
- In the “Account Access” column, you can specify how you access this account and mostly it will be online. In certain cases, if you added a row to represent an account for an offline document then you can specify it as “Offline”.
- To add a new account, you can either copy and paste an existing account and then update with the information for a new account. You can also enter all the information manually for a new account. To copy an existing row, click the row number at the left to highlight the entire row. Click CTRL+C keys to copy the row.
- Click the row number at the left on the next row. Right click and select “paste” from the menu, or click CTRL+V keys to paste the copied information. Now you can update this information to add a new account. In the Account Name, you can replace Member1 with your name or your family member name to whom the account belongs for easy identification of the account.
- All your updates are automatically saved and available for other shared users.
- Now, you can keep adding more accounts to this tracker.
By using the “Account Type”, you can group similar accounts. As an example, if you have bank accounts in multiple countries such as the US and Canada, you can group these accounts with account types as “US Bank” or “Canada Bank” to differentiate for easier tracking. Otherwise “Account Type” can be kept simply as “Bank”.
Just for easy reference and lookup, the tab and sheet are renamed to “Accounts List” and “Accounts Tracker 1”.
You can apply more formatting options to improve the readability for easier tracking and also ensure checking the specific accounts in a timely fashion. To format the column headers, select all the headers.
Click the first cell “Institute Name”, press Shift key and click “Account Access” to select all the column headers. Click the “Bold” button on the menu bar to bold the column headers. Click the “Fill Color” to select the background color. Click the “Text Color” to change the color of the header text. Now the column headers are differentiated from the data rows.
As you would have added many accounts to the tracker, now to search or look up a specific account you can apply the data filters at the columns. To apply the filter, select the column headers. Go to the “Data” menu and click “Create a Filter”. Now you can see the filter option added to the right side of the column header. Click the filter option and select specific data values to filter the records on the tracker.
Once you apply a filter on a column, there is a filter icon displayed to the right of the column header. Click the filter icon to remove the filter and display all the values in that column.
For your convenience and also to ensure that you are looking at a specific account and update the tracking information, suffix the last 2 digits of the account number to the account name.
To improve the readability further, you can alternatively color code each account group associated to an account type. This will help when you want to focus on checking a few account types more frequently than others.
By freezing the column headers, you can always view the data associated with the column headers that avoids the confusion when scrolling down to look at the data rows towards the bottom. To freeze the column header row, select the first data row. Go to the “View” Menu. Select “Freeze” and click “1 row”. Now the column headers are frozen when you scroll down.
You can copy and paste an existing account to add a new account to the tracker.
Template of the “Account Tracker” that was created as part of this tutorial is available for download with sample accounts.
Template of the “Account Tracker” that was created as part of this tutorial is available for download with sample accounts.
Download Accounts Tracker Template 1 - http://bit.ly/3GnoJZr
You can make a copy of this template and customize to add your own accounts for monitoring and tracking.
To download or make a copy of the template go to the template link provided in this video description to open the template. Click “File” menu and then click “Make a Copy”. In the pop up window you can rename the template and then click “Make a Copy”. Now the copied template will be opened in a new browser window. Click the “Accounts List” tab to start adding your accounts or updating the sample existing accounts in the template to meet your need.
In this template, generic placeholders for member names such as member 1, member 2 or member 3 are used. You can replace this with your name, or your family member name for easy recognition of the account. You can delete the accounts that are not needed or add new accounts.
To delete accounts, click the row number of the record at the left. Click the “Shift” key and select the last row of the range of records to highlight the records. Within the selected range, right click and choose “Delete Selected Rows” from the menu.
Once you create the account tracker with the list of your account, you can share that with your family members as read only or allow them to edit or add more accounts to the tracker. To share the tracker, click the “Share” button at the top right. Enter the people or groups in the text box. Click “Done” to share the template. Also restrict the template not to be accessed by anyone with the link.
If you have any questions, feedback, or suggestions about the tracker, or need help with using the tracker, post them as review below on this video.
In this video, you can take a sneak peak of the advanced tracker for the below capabilities.
In this video, you can take a sneak peak of the advanced tracker for the below capabilities.
- Advanced tracker will give a consolidated view of all your accounts with additional key tracking data points.
- You will be notified when the low APR balance transfer expiry approaches to plan for payment.
- With the last checked marker, you can track the accounts within each account type. You will never miss checking an account. Check the accounts in sequence or as needed.
- You can get real time update of days passed since the account was last checked. Prioritize the checking of accounts with the filter.
- Reduce the time spent on checking accounts that don’t need regular payments.
- Set next pay due date and next pay schedule date when you check and set payment for accounts that need regular payments.
- Avoid spending time on these accounts more frequently. Get notified when the payment due date approaches and confirm if the payment is scheduled.
- Focus on accounts needing regular payment with a convenient filter option.
- With enabled links, you can go to the account login page directly from the tracker.
Enter the relevant keywords for the tutorial.
Provide the complete url of the video starting with http.

User reviews
There are no user reviews for this listing.
Already have an account? Log in now or Create an account