| Advanced Search | Post: Deal • Question • Blog Post • Service Review • Device Review • Quick Review • Tip • App Review • Topic |
Share & grow the world's knowledge!Contribute to Cleartalking and share your expertise Promote technology products and services in many different ways with the growing community!
|
Telecom Tips
C
ctech
Updated
August 01, 2018
565 0 3 0
Manage Notifications for a particular App in iPhone
Enter the complete details of the tip you want to share.
Notifications in iPhone will help you to get a quick glance of up to date information.
But it could be overwhelming if you start to get alerts from each and every app in your iPhone.
You can make use of notifications more effectively by managing to receive only from the Apps that are important to you.
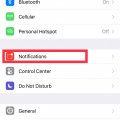
Go to Settings -> Notifications and tap the app from the list to turn the Notification on/off specifically for that App. To certain extend, turning off the unnecessary notifications will help to keep the battery longer.
This tip is relevant to: Smartphone | iPhone 7 Plus | . If this tip is related to a smart device, then it could be applicable to other similar devices and mobile OS as well.
If you would have used this tip please enter your comments using the comments button below. You can also Share a Telecom related Tip or Trick that you know.
Telecom Tips
C
ctech
Updated
August 01, 2018
627 0 10 0
Access and manage Notifications on iPhone
Enter the complete details of the tip you want to share.
You can view and manage notifications from Notification Center in iPhone. Usually you can go to notification center by swiping down from top after unlocking your phone. You can also go to notifications center in lock screen, by swiping up from the middle of the lock screen. All the notifications will be listed by day and you can scroll down to see the older notifications.
You can determine which notifications you want to receive and how do you want to receive. Go to settings -> Notification. You can turn on/off various settings like sounds, show on lock screen, badge app icon, banner, preview, etc., for the notification by app basis. To manage these settings for a specific app, tap the app and go to details screen.
Go to Settings -> Notifications and scroll down to manage Government (Amber and Emergency) alerts.
Go to Settings -> Notifications and scroll down to manage Government (Amber and Emergency) alerts.
You can delete all the notifications received for a particular day by tapping ‘X’ next to the day.
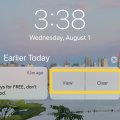
If want to respond to a notification or see more information swipe left over the notification and tap ‘View or press deeply on the notification. You also have a choice to 'Clear' that particular notification.
To clear all notifications, press any 'X' deeply and select 'Clear All Notifications'
To open the app that sent the notification just swipe right over the notification and tab 'Open'. If it’s a notification for a missed call, you can call back by swiping right and tab ‘Open’.
This tip is relevant to: Smartphone | iPhone 7 Plus | . If this tip is related to a smart device, then it could be applicable to other similar devices and mobile OS as well.
If you would have used this tip please enter your comments using the comments button below. You can also Share a Telecom related Tip or Trick that you know.
Telecom Tips
C
ctech
Updated
August 01, 2018
632 0 5 0
Tasks you can do from lock screen in iOS 11
Enter the complete details of the tip you want to share.
To access the below features in lock screen, make sure to enable them in Settings -> Touch ID & Passcode.
In iOS 11, you can access many features when your iPhone screen is locked. Usually you can go to notification center by swiping down from top after unlocking your phone. Now you can bring up all the notifications, by swiping up from the middle of the lock screen. All the notifications will be listed by day and you can scroll down to see the older notifications.
From the lock screen, you can open the camera by swiping to the left. Today's view of Widgets will appear if swipe to the right of lock screen. Touch the 3 dots below 'Press home to open' and swipe up to open the ‘Control Center’.
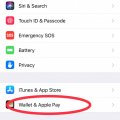
You can access Apple Pay stored cards by double-clicking the Home button, if 'Double-Click Home Button' is enabled in Settings -> Wallet & Apple Pay.
You can activate Siri to search from lock screen. If enabled, you can return missed calls and also reply to messages from lock screen.
This tip is relevant to: Mobile OS | iOS 11.4.1 iPhone 7 Plus | . If this tip is related to a smart device, then it could be applicable to other similar devices and mobile OS as well.
If you would have used this tip please enter your comments using the comments button below. You can also Share a Telecom related Tip or Trick that you know.
Telecom Tips
C
ctech
Updated
July 29, 2018
492 0 3 0
Effectively manage and use Widgets in iPhone
Enter the complete details of the tip you want to share.
Setting up Widgets in iPhone will allow you to take a quick glance at information and also to perform quick actions without opening an app. To access widgets, swipe right over the Home screen or Lock screen. It'll give a quick glance of information from the apps that are already added to the widgets.
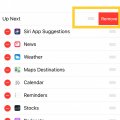
To manage the widgets, scroll to the bottom and tap Edit. You may have to use Touch ID or provide Passcode to go to the 'Add Widgets' screen. 'Add Widgets' screen will display already added widgets and the available apps to add as widget. To remove an existing widget, tab the red '-' at the left and tab the 'Remove' button at right. To add a widget, scroll down to the list of 'More Widgets' and select '+' at the left of the app to add as widget.
This tip is relevant to: Smartphone | iPhone 7 Plus | . If this tip is related to a smart device, then it could be applicable to other similar devices and mobile OS as well.
If you would have used this tip please enter your comments using the comments button below. You can also Share a Telecom related Tip or Trick that you know.
Telecom Tips
C
ctech
Updated
July 28, 2018
563 0 6 0
Add Mark Up and Text to a photo or screenshot in iPhone
Enter the complete details of the tip you want to share.
iPhone offers few cool features to enhance photos or screenshots with Markups and Text. To add Markup or Text, open a photo and select 'Edit' at the top right corner. In the edit screen, select the option to add Markup' at the bottom right. This will bring the menu to add various shapes, text, signature, etc. Also, you can change the color of the Markup or text that you would want to add to the picture.
Same options are available when you take a screenshot. You can add Markup or text before saving the screenshot.
This tip is relevant to: Smartphone | iPhone 7 Plus | . If this tip is related to a smart device, then it could be applicable to other similar devices and mobile OS as well.
If you would have used this tip please enter your comments using the comments button below. You can also Share a Telecom related Tip or Trick that you know.
Telecom Tips
C
ctech
Updated
July 28, 2018
594 0 5 0
One easy way to print out a WhatsApp message from iPhone
Enter the complete details of the tip you want to share.
There is no direct print option available to print a text message from WhatsApp in iPhone. One easy way is to copy the WhatsApp message text into notes and use the print option from notes. Notes could retain all the formatting from the WhatsApp message and the message comes out good in the print out. If you have wireless printer set up in your iPhone, you could easily print out WhatsApp messages using this option.
This tip is relevant to: Mobile OS | iOS 11.4.1 | . If this tip is related to a smart device, then it could be applicable to other similar devices and mobile OS as well.
If you would have used this tip please enter your comments using the comments button below. You can also Share a Telecom related Tip or Trick that you know.
Telecom Tips
C
ctech
Updated
July 28, 2018
698 0 7 0
Easy share of documents from Google Drive using File App in iOS 11
Enter the complete details of the tip you want to share.
If you have a document in Google Drive and want to share with others through available options, you won't find it easier to do this in iPhone. There is no direct option to share a file from Google Drive in iPhone. The closet sharing option is to use 'Send a Copy' or 'Open in' features.
In iOS 11 with the introduction of File App, you can share any document in your Google Drive easily as you share a photo in iPhone.
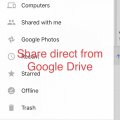
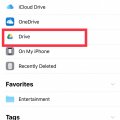
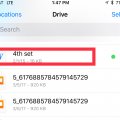
To share a file from Google Drive using Files App, open the Files App and go to 'Browse' section. Navigate to the file that you want to share in Google Drive. Touch and hold the file name to open contextual menu. Use the right scroll arrow to go and pick 'Share' option. Now you can see all the available options to share the file.
This tip is relevant to: Mobile OS | iOS 11.4.1 | . If this tip is related to a smart device, then it could be applicable to other similar devices and mobile OS as well.
If you would have used this tip please enter your comments using the comments button below. You can also Share a Telecom related Tip or Trick that you know.
Telecom Tips
C
ctech
Updated
July 27, 2018
532 0 5 0
Grouping related folders from iCloud and Google Drive for easy access in iOS 11 using File App
Enter the complete details of the tip you want to share.
If you want to group all the related folders for easy access from cloud storage (Google and iCloud drive), you can use the 'Tags' feature of the Files App to do this in iOS 11.
Open the Files App and go to 'Browse' section and select the drive in which you stored the folder. Navigate to the specific folder and touch and hold the folder to open the contextual menu. Select 'Tags' that will open the Tags screen with the list of already created tags. You can add the folder to one of the available Tags, or create a new tag using 'Add a New Tag' option at the top.
Repeat these steps to add multiple folders to a tag. Once all the folders are added to a tag, they will be available for quick access under the particular tag in 'Browse' section.
Currently this feature is not supported for OneDrive, but still you can browse OneDrive content using Files App.
This tip is relevant to: Mobile OS | iOS 11.4.1 | . If this tip is related to a smart device, then it could be applicable to other similar devices and mobile OS as well.
If you would have used this tip please enter your comments using the comments button below. You can also Share a Telecom related Tip or Trick that you know.
Telecom Tips
C
ctech
Updated
July 27, 2018
549 0 4 0
Add Folder in Cloud Storage to Files App Favorites List in iOS 11 for quick access
Enter the complete details of the tip you want to share.
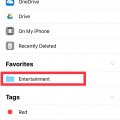
If you want access a specific folder in cloud storage often, you can add it to the Files App favorites list in iOS 11. When you add a folder to the Favorite list, it will be visible in the Favorites section of the app for quicker and easy access later.
To add a folder to the Favorites, open the File App and use 'Browse' option to go a folder at a particular storage. Hold the folder to bring the contextual menu. Once you add the folder in the ‘Favorites list', it will be available in the 'Browse' section of the Files app under favorites. This will save you few navigation steps and time if you access a folder frequently by going to the location of the folder in cloud storage.
To remove a folder from Favorites, go to ‘Browse’ option of Files App and Tap 'Edit' on the top right corner. Touch the ‘-‘at the left of a folder and tab the ‘Remove’ button at the right.
To remove a folder from Favorites, go to ‘Browse’ option of Files App and Tap 'Edit' on the top right corner. Touch the ‘-‘at the left of a folder and tab the ‘Remove’ button at the right.
This tip is relevant to: Mobile OS | iOS 11.4.1 | . If this tip is related to a smart device, then it could be applicable to other similar devices and mobile OS as well.
If you would have used this tip please enter your comments using the comments button below. You can also Share a Telecom related Tip or Trick that you know.
Telecom Tips
C
ctech
Updated
July 26, 2018
540 0 7 0
Create and manage Tags for quick document access in iOS 11 Files App
Enter the complete details of the tip you want to share.
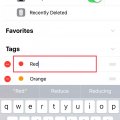
In iOS 11 files App Tags are provided to organize and group relevant or frequently used files that can be accessed quickly later. Tagging can be very powerful if it is used properly to quickly access and track files in different storage. There are few default tags with labels and colors come with the app and you can also create new tags.
To change the name of the existing tags, go to ‘Browse’ option of Files App and Tap 'Edit' on the top right corner. Now you can touch the name of a tag and edit the name.
To delete, touch the ‘-‘at the left of the tag and tab the ‘delete’ button at the right.
To rearrange a tag, touch and hold handle at the end of the label name and drag and drop to a place that you want.
Create Tag option is available only when a file is tagged.
Go to any file and touch and hold a file to bring the contextual menu. Go to the right of menu bar and select ‘Tags’. Now you'll see an option 'Add New Tag' at the top of the Tags list to create a new Tag. In the Add New Tag screen you can give a name and color to create a new Tag.
This tip is relevant to: Mobile OS | iOS 11.4.1 | . If this tip is related to a smart device, then it could be applicable to other similar devices and mobile OS as well.
If you would have used this tip please enter your comments using the comments button below. You can also Share a Telecom related Tip or Trick that you know.
Telecom Tips
C
ctech
Updated
July 26, 2018
587 0 6 0
Use Tags to organize documents for quick access in iOS 11 Files App
Enter the complete details of the tip you want to share.
It's a fantastic feature added with iOS 11 files app to organize and access your files quickly, if you’re using multiple cloud services for file storage. You can tag the files stored either in iCloud Drive or the other cloud storages like Google drive, OneDrive, etc. Once you tag the frequently used files, they can be accessed quickly instead navigating and going through the folders to find them.
You can assign files to the available default tags, or create your own tag with a label and color. To add a tag to a file, browse to a particular file location and hold on the file. Contextual menu will open up from which you can select a tag to assign to the file. In the same screen you'll see an option to create a new tag as well.
After adding a file to a tag it'll be available at the browse section under that tag for quicker access later. You can tag a single file to multiple tags.
This tip is relevant to: Mobile OS | iOS 11.4.1 | . If this tip is related to a smart device, then it could be applicable to other similar devices and mobile OS as well.
If you would have used this tip please enter your comments using the comments button below. You can also Share a Telecom related Tip or Trick that you know.
Telecom Tips
L
lynnsy
Updated
July 25, 2018
529 0 3 0
Setup Apply Pay Cash Card to send or receive money through iMessage
Enter the complete details of the tip you want to share.
In iOS 11 and above, you can send cash to family or friends through iMessage. You have to set up the Apple Pay Cash Card by adding a debit or credit card prior to using this feature. Once this is set up, you can bring the Apple Pay within the iMessage to initiate a transaction. You can set the dollar amount that you’re requesting or paying and complete the transaction. Once the transaction completes, amount will be available instantly in the wallet to use.
This tip is relevant to: Mobile OS | iOS 11.4.1 | . If this tip is related to a smart device, then it could be applicable to other similar devices and mobile OS as well.
If you would have used this tip please enter your comments using the comments button below. You can also Share a Telecom related Tip or Trick that you know.
Telecom Tips
C
ctech
Updated
July 24, 2018
545 0 4 0
Turn on dark mode in Iphone using Invert Colors
Enter the complete details of the tip you want to share.
It's easy to make your iPhone screen darker in iOS 11. Go to Settings > General > Accessibility > Display Accommodations > Invert Colors. You can choose either Smart Invert or Classic Invert. Smart Invert only makes the display darker, and doesn't change the images, media and some apps that use darker colors. Classic Invert reverses the colors of everything on screen.
This tip is relevant to: Mobile OS | iOS 11.4 | . If this tip is related to a smart device, then it could be applicable to other similar devices and mobile OS as well.
If you would have used this tip please enter your comments using the comments button below. You can also Share a Telecom related Tip or Trick that you know.
Telecom Tips
C
ctech
Updated
July 24, 2018
459 0 4 0
Convert HEIF files to JPEGs automatically in iOS 11 when exported
Enter the complete details of the tip you want to share.
If you would have enabled High Efficiency format for photos and videos in your iPhone, they will be automatically saved as HEIF and videos as HEVC files. If you need the photos and videos to be converted to the compatible format when exported or shared, go to Settings > Photos and enable Transfer to Mac or PC to Automatic. After this it will automatically transfer the photos (as JPEG) and videos in a compatible format.
This tip is relevant to: Mobile OS | iOS 11.4.1 | . If this tip is related to a smart device, then it could be applicable to other similar devices and mobile OS as well.
If you would have used this tip please enter your comments using the comments button below. You can also Share a Telecom related Tip or Trick that you know.
Telecom Tips
C
ctech
Updated
July 23, 2018
747 0 3 0
Save storage in your iPhone by storing photos and videos in High Efficiency formats
Enter the complete details of the tip you want to share.
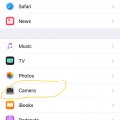
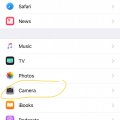
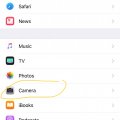
iOS 11 supports HEIF (High Efficiency Image Format) for photos and HEVC (High Efficiency Video Coding) for video. Photos and videos stored in these formats offer much better compression than JPEG format that helps to save storage in iPhone. Once you enable this format at Settings > Camera > Formats and select High Efficiency, your photos will be automatically saved as HEIF and videos as HEVC files.
This tip is relevant to: Mobile OS | iOS 11.4.1 | . If this tip is related to a smart device, then it could be applicable to other similar devices and mobile OS as well.
If you would have used this tip please enter your comments using the comments button below. You can also Share a Telecom related Tip or Trick that you know.
Telecom Tips
C
ctech
Updated
July 23, 2018
546 0 4 0
iOS 11 - customize Control Center as you like in your iPhone
Enter the complete details of the tip you want to share.
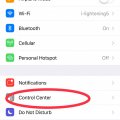
If you want to add more controls or change default choices in your Control Center, you can do this by going to Settings > Control Center > Customize Controls.
Here you can add the available additional controls such as Apple TV Remote, Stop Watch, Magnifier, etc. you can also remove or reorder the items in a way you like.
Here you can add the available additional controls such as Apple TV Remote, Stop Watch, Magnifier, etc. you can also remove or reorder the items in a way you like.
This tip is relevant to: Mobile OS | iOS 11.4.1 | . If this tip is related to a smart device, then it could be applicable to other similar devices and mobile OS as well.
If you would have used this tip please enter your comments using the comments button below. You can also Share a Telecom related Tip or Trick that you know.
Telecom Tips
C
ctech
Updated
July 23, 2018
775 0 5 0
Turn on/off Live Photos and preserve the setting in iPhone
Enter the complete details of the tip you want to share.
Live Photos is a fantastic feature in iPhone that captures few seconds of action at the beginning and end of each photo shot. However this takes more space than a regular photo which is also not necessary for every occasion.
When you want to take regular single shot Photos most of the time, it's better to turn off Live Photos. To turn off the Live Photos, touch the yellow (when it's turned on) circle at the top of the Camera. Once turned off, yellow circle will turn it to white. This method of manually disabling Live Photos will last only for that particular camera session. If you close the camera and open again, Live Photos would have been turned on again.
If you have to make the preference of Live Photos stay permanently then go to Settings -> Camera -> Preserve Settings and enable Live Photo. This'll preserve your Live Photos preference.
This tip is relevant to: Mobile OS | iOS 11.4.1 | . If this tip is related to a smart device, then it could be applicable to other similar devices and mobile OS as well.
If you would have used this tip please enter your comments using the comments button below. You can also Share a Telecom related Tip or Trick that you know.
Telecom Tips
C
ctech
Updated
July 23, 2018
540 0 10 0
Camera filter options to take cool photos with iPhone
Enter the complete details of the tip you want to share.
iOS 11 offers multiple camera filter options that help to take more professional and cool looking photos. It offers 3 basic filters with variations - vivid, Dramatic and Mono. You can apply them when you take a photo or while editing an existing one.
It's fun to experiment with these modes and get enjoyable experience with your photos. With vivid mode, color and saturation can be increased and make the colors stronger. Dramatic and monochrome variations allow controlling the light and adding professional touch to the pcitures.
This tip is relevant to: Mobile OS | iOS 11.4.1 | . If this tip is related to a smart device, then it could be applicable to other similar devices and mobile OS as well.
If you would have used this tip please enter your comments using the comments button below. You can also Share a Telecom related Tip or Trick that you know.
Telecom Tips
C
ctech
Updated
July 23, 2018
644 0 10 0
Preserve iPhone camera's filter mode
Enter the complete details of the tip you want to share.
In iOS 11, iPhone Camera filter is defaulted to 'Original'. If you would have changed this to one of the other available options, it will stay until you exit out. After closing and reopen the camera it will be back to 'Original' filter. If you want keep a certain filter capture option for a while, this behavior could be frustrating. Now manually changed filter setting can be preserved by turning on the filter option at Settings -> Camera -> Preserve Settings -> Filter.
This tip is relevant to: Mobile OS | iOS 11.4.1 | . If this tip is related to a smart device, then it could be applicable to other similar devices and mobile OS as well.
If you would have used this tip please enter your comments using the comments button below. You can also Share a Telecom related Tip or Trick that you know.
Telecom Tips
C
ctech
Updated
July 22, 2018
490 0 3 0
Preserve iPhone camera's last used shooting mode
Enter the complete details of the tip you want to share.
If the Camera Mode is turned off in iPhone, it always defaults to the factory Photo mode after you use camera for an activity like recording a video. Instead of leaving in the video mode on after exiting the camera, it would switch back to photo mode.
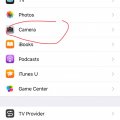
By turning on the Camera Mode, now you can preserve the last shot mode in the camera. Go to Settings → Camera → Preserve Settings to turn on the Camera Mode.
This tip is relevant to: Mobile OS | iOS 11.4.1 | . If this tip is related to a smart device, then it could be applicable to other similar devices and mobile OS as well.
If you would have used this tip please enter your comments using the comments button below. You can also Share a Telecom related Tip or Trick that you know.

